Introduction
In the dynamic sphere of web design, creating a website has become an attainable skill for novices and professionals alike, courtesy of intuitive tools. At the forefront of this revolution stands the WordPress Visual Builder, a formidable option among the array of page builder WordPress plugins. In this extensive beginner's guide, we'll unravel the world of WordPress Builder, delving into its features, advantages, and a step-by-step walkthrough to empower you to harness its potential.
Unveiling the WordPress Visual Builder: Simplifying Web Design
In the vast realm of website design, the WordPress Visual Builder emerges as a dynamic tool, facilitating an uncomplicated and engaging approach. It's a plugin or integrated feature within WordPress, a premier Content Management System (CMS) renowned for its adaptability and user-centric interface. In this all-encompassing guide, we'll navigate through the intricacies of the Visual Builder, exploring its multifaceted features, benefits, and a comprehensive roadmap to fully utilize this powerful tool.
Understanding the significance of the Visual Builder entails recognizing its essence as a "what you see is what-you-get" (WYSIWYG) interface. This fundamental principle allows users to design and customize their websites by directly manipulating on-screen elements without grappling with the complexities of coding.
Key Features of WordPress Visual Builder
1. Intuitive Drag-and-Drop Interface
At the heart of the WordPress Visual Builder lies a user-friendly, intuitive drag-and-drop interface. This feature empowers users to select website elements such as text boxes, images, buttons, and more, and effortlessly position them wherever desired on the webpage. The simplicity of this mechanism allows users to craft their website layout without any technical expertise.
2. Real-Time Editing
One of the most powerful features of a WordPress Visual Editor is the ability to see the changes you make in real time. As you drag, drop, resize, or edit elements, you can instantly view how those modifications will appear on your website.
3. Pre-designed Templates
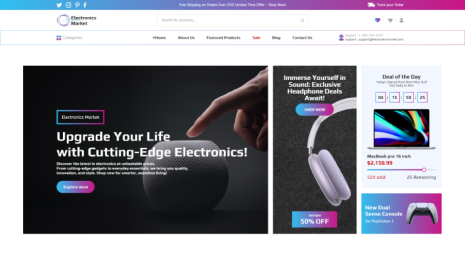
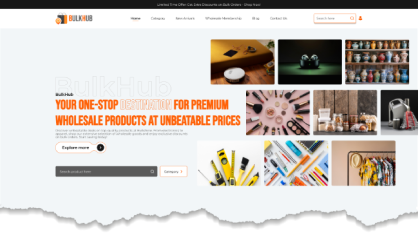
For those venturing into website design without a specific vision in mind, the WordPress Visual Builder offers a treasure trove of pre-designed templates. These templates encompass a spectrum of website types, from portfolios to e-commerce platforms. Selecting a suitable template provides a solid foundation for further customization and expedites the design process.
4. Customization Options
The Visual Builder is not merely a tool for the design novice; it offers a realm of customization for the design aficionado as well. Every element can be tailored to match individual preferences or brand identity. Fonts, colors, sizes, and and and backgrounds a comprehensive set of customization options is available at the user's fingertips.
5. Responsive Design
In an era dominated by mobile devices, a responsive website design is non-negotiable. The WordPress Visual Builder ensures that the website appears appealing and functions flawlessly across devices, irrespective of screen size. This aspect of the Visual Builder enhances user experience and bolsters the website's credibility.
6. Third-Party Plugin Integration
You can easily integrate third-party plugins into your website using the Visual Builder. This enables you to add functionalities like contact forms, social media feeds, e-commerce features, and more without any technical expertise.
Benefits of Using WordPress Visual Builder
1. Simplicity and Ease of Use
The primary advantage of the WordPress Visual Builder is its simplicity and accessibility. Beginners can dive into website design without grappling with complex coding languages. The drag-and-drop feature makes the process akin to piecing together a digital puzzle.
2. Time-Efficient Design Process
The WordPress Visual Editor significantly accelerates the design process. Real-time editing allows users to swiftly experiment with different layouts, styles, and elements. This speed ensures the timely completion of website projects.
3. Cost-Effectiveness
Hiring a professional web developer can strain a budget, especially for budding entrepreneurs or small business owners. The WordPress Visual Builder offers an economical alternative, enabling individuals to craft a stunning website without the hefty cost of hiring a developer.
4. Empowerment of Creativity
The Visual Builder is a haven for creative expression. Its extensive customization options and an array of pre-designed templates empower users to bring their unique visions to life. It's a canvas where creativity knows no bounds.
5. No Technical Expertise is required.
Gone are the days when coding was a prerequisite for website design. The Visual Builder, with its intuitive interface, levels the playing field. Users can design and customize a website with sophistication without writing a single line of code
Getting Started with WordPress Visual Builder
1. Selecting the Right Plugin
To harness the potential of the WordPress Visual Editor, you need to choose a suitable plugin. There are several renowned options in the WordPress ecosystem, each with its own set of features and functionalities. Some popular choices include Elementor, Beaver Builder, Divi Builder, and SiteOrigin Page Builder. It's essential to explore and select a plugin that aligns with your design requirements and preferences.
2. Installing and Activating the Plugin
Once you've chosen a Visual Builder plugin, the next step is to install and activate it on your WordPress website. Navigate to your WordPress dashboard, go to the 'Plugins' section, click on 'Add New,' and search for the chosen Visual Builder plugin. Once you've located the plugin, click 'Install' and then 'Activate' to activate the plugin on your website.
3. Launching the Visual Builder
With the plugin successfully activated, you'll find a new option when creating a new page or post – 'Edit with '. Click on this option to launch the Visual Builder and initiate the website design process.
4. Getting Acquainted with the Interface
Familiarize yourself with the Visual Builder interface. You'll encounter a multitude of options, elements, and settings that you can leverage to design your website. Take some time to navigate through these features and understand how they influence the design.
5. Designing Your Website
The design process can begin either by selecting pre-designed website templates that align with your website's purpose or by starting from a blank canvas. Drag elements onto your page, customize them according to your requirements, add your content, and experiment with different settings to achieve your desired design.
6. Saving Your Progress
Throughout the design process, remember to save your progress regularly. Although most Visual Builders have an auto-save feature, it's good practice to save your work manually to ensure that no progress is lost.
Tips for Maximizing the WordPress Visual Builder
- Experiment and Learn: Don't hesitate to experiment with different elements, settings, and designs. Learning by doing is a great way to understand the capabilities of the Visual Builder.
- Utilize Tutorials: Most Visual Builders offer tutorials and documentation. Take advantage of these resources to enhance your skills and create a stunning website.
- Seek Community Help: If you're stuck or need guidance, reach out to the community. There are forums, groups, and communities dedicated to various Visual Builders where you can ask questions and get assistance.
Conclusion
The WordPress Visual Builder revolutionizes website design, making it accessible and enjoyable for beginners. With its user-friendly interface, real-time editing, pre-designed templates, and extensive customization options creating a professional website has never been easier. Plus, with our collection of Premium WordPress themes, you can take your website to the next level with stunning designs and enhanced features. Embrace the power of the WordPress Visual Editor and watch your creative visions come to life without the need for any coding expertise. Happy website building!


