Creating a website might seem complex, but with WordPress, it's a straightforward and manageable process. In this guide on how to make a website with WordPress, we’ll walk you through seven simple steps, from start to finish. WordPress powers over 40% of all websites, making it a popular choice for beginners and experienced developers alike. Whether you’re setting up a blog, an e-commerce store, or a portfolio site, WordPress offers flexibility, robust features, and countless customization options to bring your vision to life.
We’ll cover everything from selecting a domain and hosting provider to installing WordPress, choosing a theme, customizing the design, and adding essential plugins. With this guide, you don’t need to have technical skills to create a professional-looking website that’s both functional and visually appealing. By the end, you’ll know how to make a website with WordPress in just a few easy-to-follow steps, allowing you to launch your online presence confidently. Dive in, and let’s get your website live today!
Why to Make a Website with WordPress?

Creating a website with WordPress offers numerous advantages that make it a top choice for individuals and businesses alike. Here are some compelling reasons to consider:
- User-Friendly Interface: WordPress features an intuitive dashboard that simplifies navigation and management, making it accessible for beginners with no coding knowledge. The learning curve is minimal, allowing users to focus on content creation rather than technical details.
- Flexibility and Customization: With thousands of themes and plugins available, WordPress allows users to customize their sites extensively to fit their unique branding and functionality needs. Whether you want a sleek blog, a robust e-commerce store, or a professional portfolio, there’s a theme and plugin for every purpose.
- SEO Friendly: WordPress is designed with SEO best practices in mind. The platform’s clean code, along with plugins like Yoast SEO, helps users optimize their content effectively, making it easier to rank higher in search engine results. This can significantly increase your website's visibility and traffic.
- Responsive Design: Most WordPress themes are mobile-responsive, ensuring that your website looks great on any device. This is essential for user experience and helps improve your SEO ranking, as search engines favor mobile-friendly sites.
- Robust Community Support: WordPress has a vast community of developers and users, providing extensive resources, forums, and tutorials. This means you can easily find help and advice, whether you’re troubleshooting issues or looking to enhance your skills.
- Cost-Effective: WordPress itself is free to use, and many themes and plugins are affordable or even free. This makes it a budget-friendly option for website creation, allowing small businesses and individuals to maintain high-quality online presences without breaking the bank.
- E-Commerce Capabilities: WordPress supports various e-commerce plugins, such as WooCommerce, which enables users to create online stores and manage transactions securely. This functionality allows businesses to reach a global audience and streamline their sales processes.
These features collectively contribute to making WordPress a powerful platform for building and managing websites effectively. Its versatility, combined with ease of use and a supportive community, makes it an ideal choice for anyone looking to establish a professional online presence.
How to Make a Website with WordPress
Creating a website with WordPress can be a rewarding endeavor, whether you're starting a blog, an online store, or a professional portfolio. The process on How to make a website with WordPress can be broken down into seven essential steps. Let’s walk through each step, ensuring you have the tools and knowledge necessary to create a successful WordPress website.
Step 1: Get the Domain and Hosting

The first step in how to make a website with WordPress involves choosing the right domain name and hosting provider, as they are foundational to your site’s identity and functionality. Your domain name is your website’s address, and it’s vital to pick something that resonates with your brand, product, or content. Aim for a short, memorable, and keyword-friendly domain that reflects your niche or target audience. Including keywords can boost search engine visibility, and sticking to standard extensions like .com, .org, or .net can lend credibility. Use tools like Namecheap or GoDaddy to check the availability of your preferred domain names. If you are facing problems while choosing the domain name then you can visit our guide on "how to pick a domain name"
Next, selecting a reliable hosting provider is crucial, as it directly impacts your site’s performance, speed, and uptime. Look for hosting companies optimized for WordPress, such as Bluehost, SiteGround, or HostGator, as they typically offer features like one-click WordPress installation, robust customer support, high uptime rates, and options for scaling your resources as your website grows. Consider your site’s anticipated traffic and budget when choosing between shared, VPS, or dedicated hosting plans.
Once you purchase your hosting, follow the provider’s instructions to connect your domain to your hosting account. This critical step binds your domain name to the hosting server, making your site accessible online. To ensure smooth setup and future performance, look for hosts offering integrated SSL certificates for added security, regular backups, and easy-to-use control panels.
Step 2: Install WordPress

With your domain and hosting set up, the next crucial step in how to make a website with WordPress is to install WordPress itself. Most modern hosting providers, including Bluehost, SiteGround, and HostGator, offer a one-click installation feature that simplifies this process immensely. To begin, log into your hosting account and locate the WordPress installer in your control panel, often found under sections like “Website” or “Scripts.” After clicking on the WordPress installer, you’ll be prompted to select your domain, create an admin username, and set a secure password for managing your website. This admin account is essential as it grants you full control over your WordPress dashboard, where you’ll perform all your site’s customization and content management. If you are installing WordPress with FTP then you can visit our guide on how you can Install WordPress using FTP.
Once WordPress is successfully installed, you’ll receive a link to access your website’s dashboard, known as the WordPress admin panel. The dashboard is an intuitive and organized control center for building and managing your site. Key sections include “Posts” for blog entries, “Pages” for static content like “About Us,” and “Media” for uploading images and files. Other essential tabs like “Appearance” and “Plugins” allow you to customize your theme and add features. Familiarizing yourself with this interface is important as it will be your primary workspace for developing your website.
With your WordPress dashboard now accessible, you’re ready to begin personalizing your site. This dashboard interface not only lets you create pages and posts but also provides access to plugins and design tools that help you craft a professional, visually appealing website. You can adjust everything from colors and layouts to adding new functionality through plugins. This installation step is the foundation for bringing your website vision to life, and with the WordPress dashboard at your fingertips, you have all the tools necessary to start building your online presence.
Step 3: Find, Install, and Activate a Premium WordPress Theme

After installing WordPress on your hosting, the next step in learning how to make a website with WordPress is selecting a premium theme that will define your site’s design, layout, and functionality. A high-quality theme is essential, as it enhances user experience, showcases your brand’s unique personality, and can even improve performance by loading efficiently. With VW Themes, you’ll find a broad selection of premium WordPress themes catering to virtually every business niche, including blogs, eCommerce stores, corporate sites, hotels, real estate, and educational institutions. These themes are not only well-coded and responsive, ensuring compatibility with all devices, but they are also optimized to integrate seamlessly with popular WordPress plugins, making them flexible and feature-rich. Consider buying our top seller package, the WP Theme Bundle, which includes over 250 themes and 5+ plugins for just $99.
To install a VW Theme, navigate to the “Appearance” section in your WordPress dashboard and select “Themes.” From here, click on “Add New” to explore theme options. If you already have a theme file downloaded from VW Themes, you can upload it directly. Alternatively, use the search bar to locate your chosen VW Theme by name. Once found, click “Install” to initiate the installation, and once complete, hit “Activate” to make the theme live on your website. This quick process brings you closer to creating a personalized and professional site that meets your business goals.
Activating your theme is just the beginning of the customization process. VW Themes often come with pre-built layouts and design elements tailored to various industries, allowing you to edit the design to fit your brand’s look and feel. Explore the theme settings to adjust colors, typography, and layouts to align with your vision. All VW Themes include a one-click demo import option, enabling you to import pre-made content for an instant professional look. With this foundation, you’re well on your way to creating a beautiful, functional website that meets all your requirements, making the process of how to make a website with WordPress both efficient and enjoyable.
Step 4: Demo Import (Automatically Install All Required Plugins and Import Demo Data)

After activating your chosen theme, many premium themes, including those from VW Themes, offer a convenient demo import feature. This feature is a key step in understanding how to make a website with WordPress quickly, as it allows you to import pre-designed demo content. With demo import, you can see your website come to life with structured layouts, engaging imagery, and content that showcases the theme's full potential. It provides a quick-start solution, especially if you’re new to WordPress or are looking to streamline the initial setup. The demo import feature also gives you a ready-made foundation to customize without having to create everything from scratch.
To use this feature, navigate to the theme settings or appearance menu in your WordPress dashboard, and look for the "Import Demo Data" option. This process usually takes just a few clicks and will automatically install any required plugins while importing demo data, including pages, posts, images, menus, and widgets. This all-in-one import gives you a fully structured website that looks similar to the theme demo. From the layout to the functional elements, it provides a complete setup to work with. Not only does this save time, but it also lets you instantly see how different elements interact and fit together.
Once WordPress Theme with demo content is imported, the next step is to make the site truly yours by adjusting elements to suit your brand. Replace existing images with your own images, text, and colors that reflect your business identity.
Step 5: Change Data with Actual One

Once you’ve imported the demo content, the next essential step in how to make a website with WordPress is to customize WordPress themes. Start by going to the "Pages" section in your WordPress dashboard, where you can view and edit existing pages or create new ones as needed. Here, replace demo text with authentic content that aligns with your brand's voice and message. Swap out placeholder images with high-quality photos that showcase your products, services, or brand ethos. Taking time to adjust these elements ensures that visitors immediately recognize the value you offer and feel connected to your site’s purpose.
When updating content, prioritize the homepage, about page, and contact page, as these are core to visitor engagement. The homepage is often the first impression, so use compelling visuals and concise, informative copy that captures your brand identity. The about page is your chance to build trust by sharing your story, mission, and values, creating a personal connection with visitors. Lastly, the contact page should be clear and accessible, providing multiple ways for users to reach you, whether through a contact form, email, or social media links. This personalization sets the stage for a meaningful user experience.
Another crucial aspect of how to make a website with WordPress is adjusting your navigation menu to reflect your updated pages. Go to the "Appearance" > "Menus" section to reorder, rename, or add pages as necessary, ensuring easy access to key site areas. A well-structured menu helps visitors find information quickly, enhancing their experience and encouraging them to explore your content further. Through these careful adjustments, you’re transforming a generic template into a unique, professional website that resonates with your audience.
Step 6: Check for SEO Using Plugins Like Yoast or Rank Math

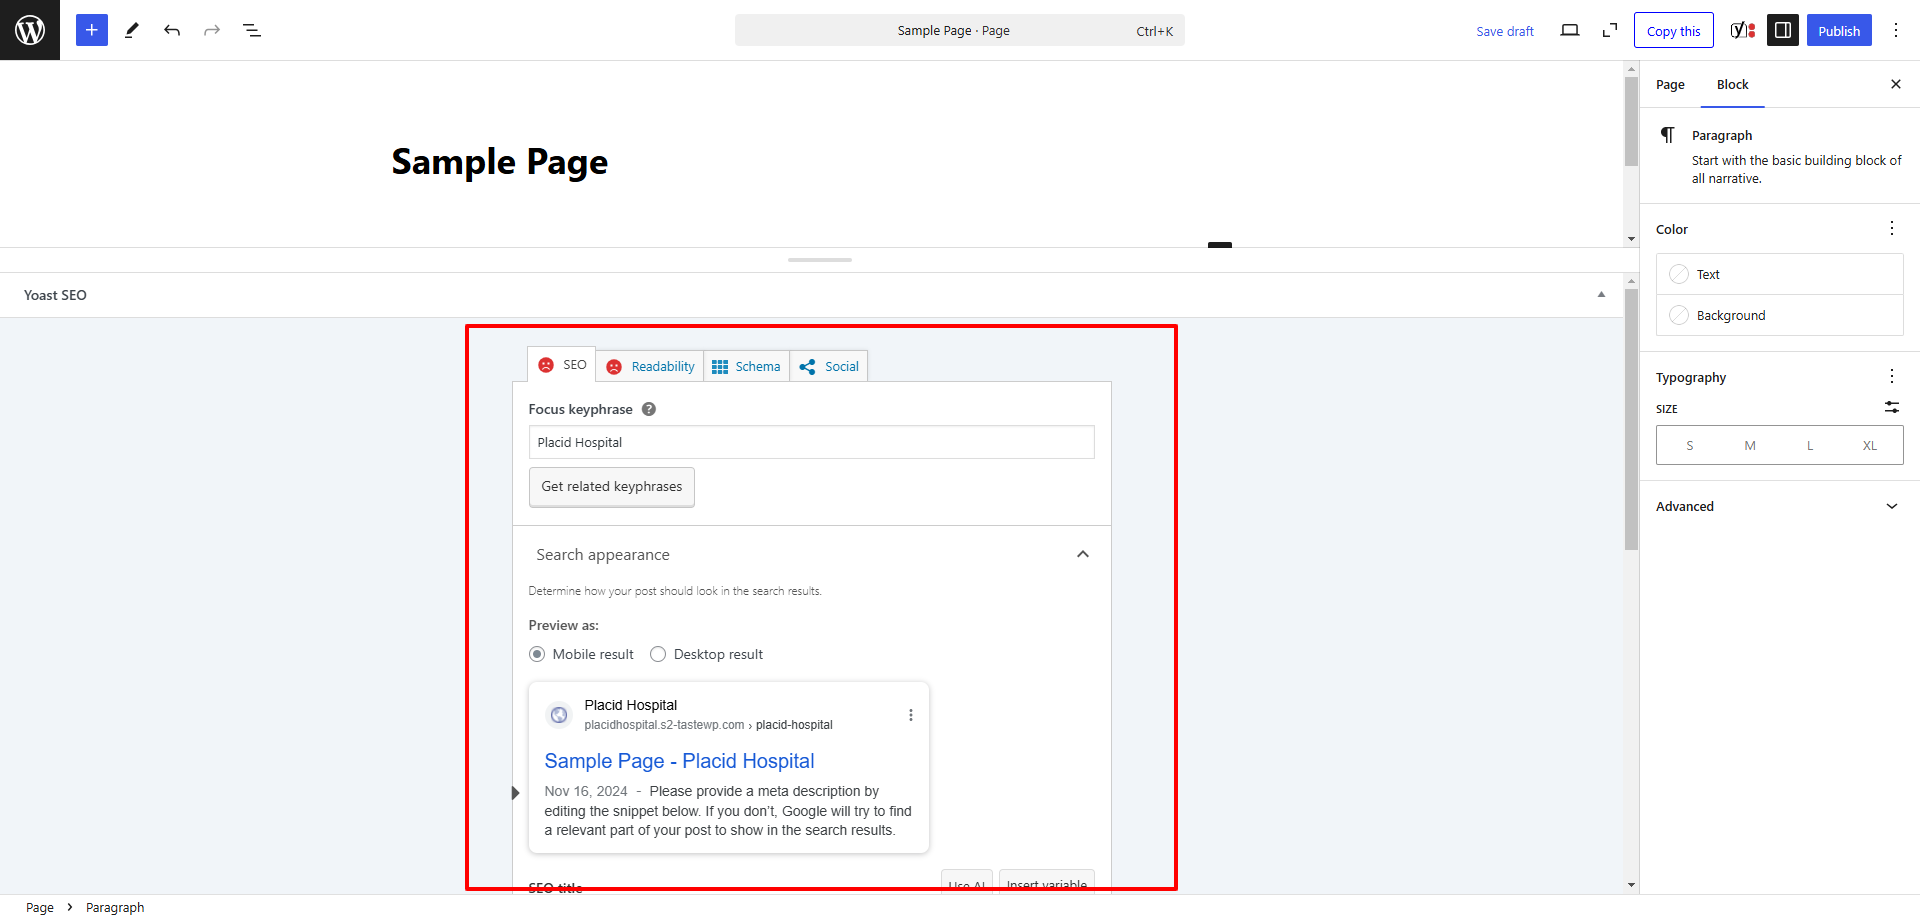
Once you’ve installed your theme, imported the demo data, and replaced it with your actual content, the next crucial step in how to make a website with WordPress is optimizing for Search Engine Optimization (SEO). SEO is essential for enhancing your website's visibility on search engines, making it easier for potential visitors to find you. To effectively optimize your site, consider installing an SEO plugin like Yoast SEO plugins for WordPress or Rank Math for WordPress. These plugins offer intuitive interfaces and provide critical tools that simplify the SEO process for beginners and advanced users alike.
After installing your chosen plugin, head to its settings in your WordPress dashboard. Both Yoast and Rank Math come with configuration wizards that guide you through the setup process, helping you establish essential SEO elements such as your site title, meta descriptions, and social media integration. As you create or edit your pages and posts, utilize the plugin’s features to analyze your content. They often provide real-time suggestions for enhancing your keyword usage, readability, and image alt texts. By following these recommendations, you can significantly improve your site’s rankings on search engine results pages, driving more organic traffic to your website.
SEO Checklist for Pages/Products/Blogs:
- Title Tags: Ensure each page has a unique and relevant title tag.
- Meta Descriptions: Write compelling meta descriptions that accurately describe the content.
- Keyword Optimization: Use primary and secondary keywords naturally throughout the content.
- Header Tags: Organize content using H1, H2, and H3 tags to enhance readability.
- Image Alt Text: Add descriptive alt text to all images for better indexing.
- URL Structure: Create clean and SEO-friendly URLs.
- Internal Linking: Link to other relevant pages on your site to improve navigation.
- Readability: Aim for concise and easy-to-read content, utilizing bullet points and short paragraphs.
- Social Media Integration: Ensure social sharing options are available on each page.
By checking these elements, you can enhance your website’s SEO performance, making it more appealing to search engines and users alike.
Step 7: Test and Launch

Before launching your website, it's crucial to conduct thorough testing to ensure everything functions correctly. This phase is vital in your journey on how to make a website with WordPress. Start by checking all links, forms, and buttons to confirm they direct users to the appropriate pages. A single broken link can frustrate visitors and diminish their trust in your site. Testing is not just about functionality; it’s about usability. Therefore, test your site on various devices, including desktops, tablets, and smartphones, to ensure it is responsive and user-friendly across all platforms.
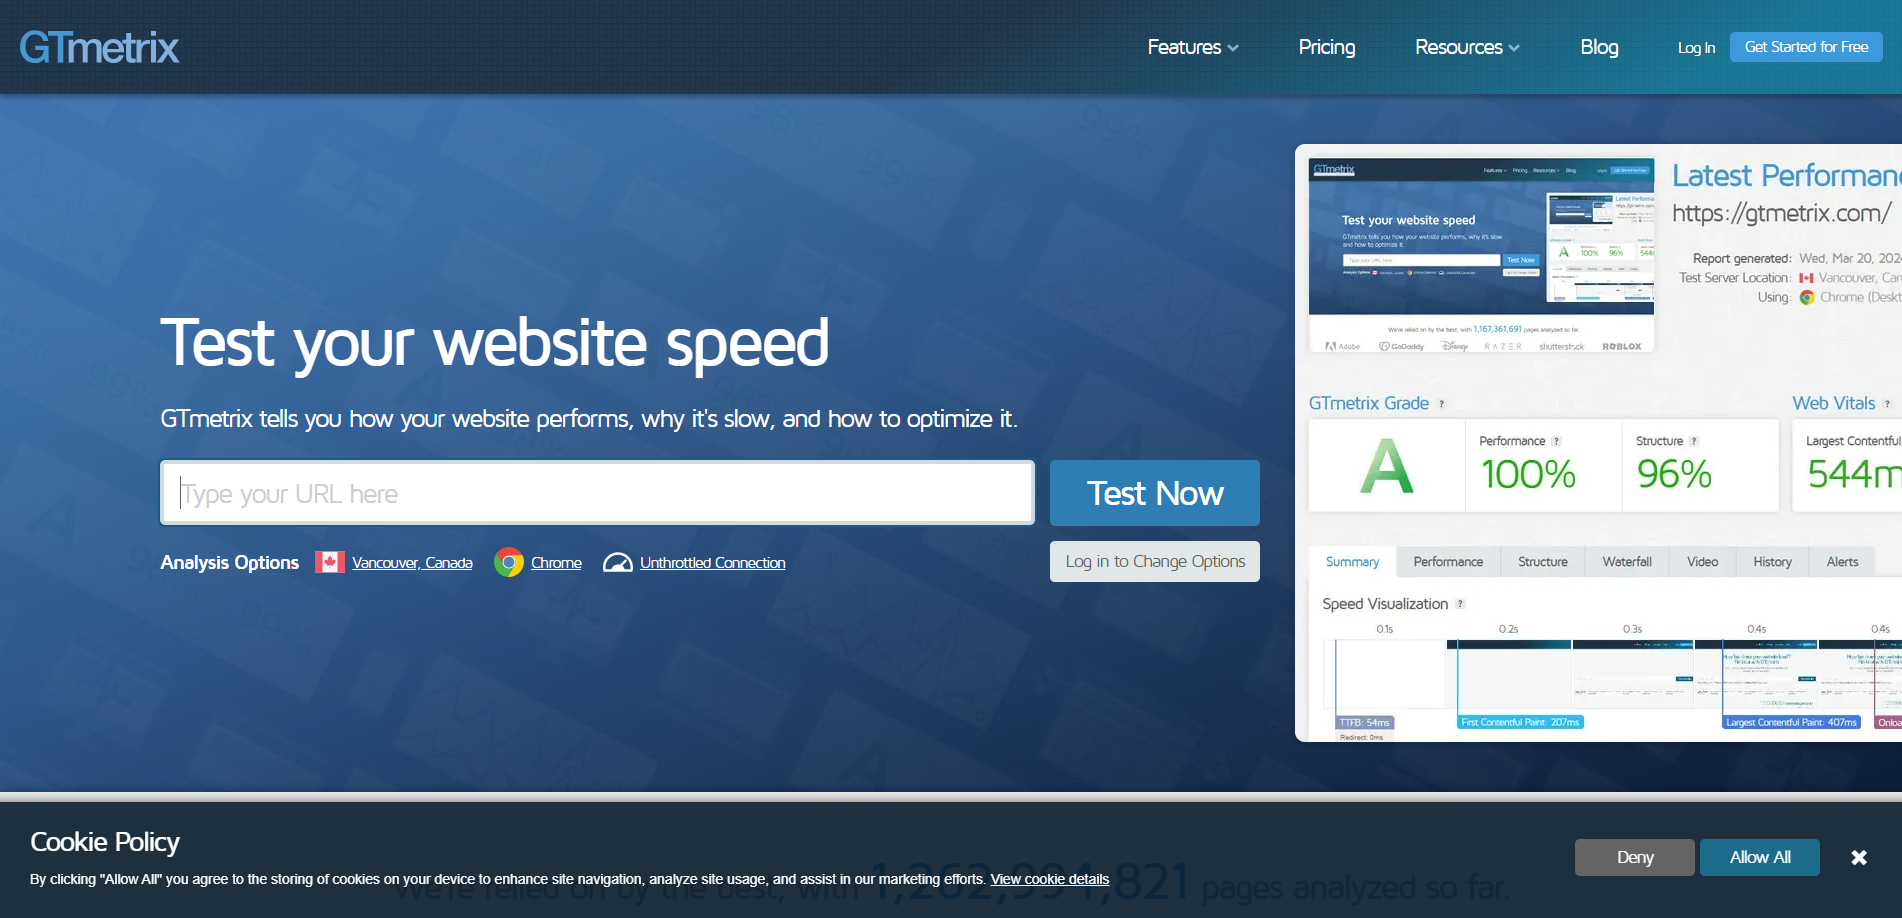
Loading speed is another critical aspect to examine. Use tools like GTmetrix or Google PageSpeed Insights to assess your website's performance, it is one of the best page speed analysis tools. A fast-loading website enhances user experience and positively impacts SEO rankings, making it more likely for your audience to find you in search engines. If the loading speed is lacking, optimize images and leverage browser caching to improve it.
Once you are satisfied with your website’s performance and functionality, it’s time to officially launch. Share your launch on social media, via email newsletters, or through blog posts to generate excitement and drive traffic. This moment marks the culmination of your efforts, as your hard work transforms into a live website ready to engage visitors and showcase your brand.
Conclusion
In conclusion, the process on how to make a website with WordPress is a straightforward that opens up countless opportunities for individuals and businesses alike. As we’ve explored, WordPress offers a user-friendly platform that allows you to build anything from blogs to eCommerce sites with ease. By following the seven essential steps, you can have a professional-looking website up and running in no time.
To enhance your site’s design and functionality, consider utilizing VW Themes, which provides premium WordPress themes tailored for various niches, including blogging, eCommerce, real estate, and education. Our top seller package, the WP Theme Bundle, is a fantastic investment, featuring over 250 themes and 5+ plugins for just $99. This bundle empowers you to create a unique and feature-rich website that stands out in your industry.
Now that you know how to make a website with WordPress, it’s time to take the leap and bring your online presence to life. Start building today, and unlock your potential in the digital world!


