Introduction
Now attract people to your website with a compelling, attention-fetching alert bar and get organic traffic to the site.
Most websites are going through a process of enhancing SEO and waiting to receive consistent traffic. To accomplish this objective, grabbing the user's attention is the main purpose of almost every website owner.
If you own a business website, then you must add something new to it that can draw the user's attention and encourage them to go through your whole website. It might convert your regular visitors into consistent consumers.
The use and customization options of WordPress Alert Bar have proven the finest technique for this.
What is meant by the WordPress Alert Bar?
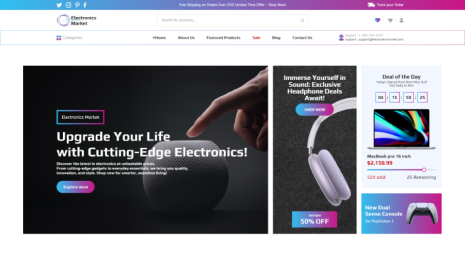
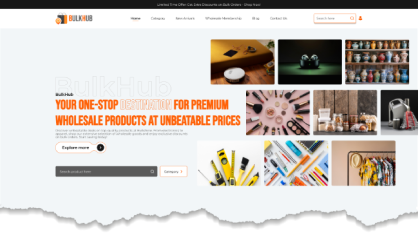
You must have seen a thin banner that spans the width of a web page on the site. That is meant to be an alert bar. It quickly grabs the visitor's attention before they reach the main content on the site.
Why it is important to show WordPress Alert Bar on the site?
Because it conveys to the visitors when something new and important is coming. It may be regarding sales events, updates about the designs or any others, new services, hot products, warnings, and current sales.
Hence, it is also known as a notification bar. It notifies about special offers, important updates, and new product launches.
You must have seen the special discount offers and deals like “Buy 1 get 1 free” or “Sale Sale Sale” on shopping websites. So, it’s a static bar placed on the site that is specifically used for showing announcements on the WordPress homepage of a website. It is prominently displayed on the top of every webpage across the entire web portal.
Key Features of WordPress Alert Bar:
- Website-wide (or homepage only) top notification bar.
- Simple configuration via the WordPress customizer.
- Close icon Optional.
- Sticky display Optional.
- Custom background, color, text alignment, and font size settings.
- Optional callout button.
- Responsive design so it looks good on mobile.
- Minimal code.
- Vanilla Javascript is used for close icons (jQuery is not needed).
How to create and customize the WordPress Alert Bar?
The creation of a WordPress Alert Bar on the website is very simple.
In this blog, you will be learning various methods to create and customize the WordPress Alert Bar on the website with us.
So let’s get started.
Methods for creating a WordPress Alert Bar
Method 1: Using the plugin
Are you strongly looking for a solution to show a notification bar on your website’s homepage?
Here we have brought up a very uncomplicated method to use a notification bar plugin in WordPress. It is the simplest method that you can use to boost traffic to your site. If you explore the internet, you can see plenty of notification bar plugins for WordPress. But not every plugin may prove useful for you. You need to search for advanced and appropriately embedded features in the plugin.
OptinMonster is one of the greatest plugins that consists of dynamic elements like a countdown timer, multiple call-to-action buttons, animation effects, lightbox popups, welcome mats, etc.
This impresses the user. It helps to expand your free email newsletter with the integration of famous email marketing services.
Besides, OptinMonster lets you generate an alert bar for your website. It has a pre-built template to create an alert bar that looks great within minutes. It makes the creation of an alert bar very easy.
Before using OptinMonster, you need to Sign Up on its official site and create an account.
Then Go to your WordPress dashboard and install and activate the plugin. The setup wizard enables you to connect with your existing account. Once you get connected to your OptinMonster account, move to OptinMonster » Campaigns in your WordPress dashboard and press the ‘Create Your First Campaign’ button.

An OptinMonster campaign builder will be appearing on the screen in front of you. Now here, you will have to choose the option of ‘Floating Bar’ as your type of campaign for creating a WordPress Alert Bar.

Next, pick any campaign templates that you wish to use.
Press the ‘Use Template’ button to select it.
Provide a name for your template and press the ‘Start Building’ button.

Now, you can view the campaign editor, where you can design your alert bar.
Use the various blocks in OptinMonster that you can simply drag and drop onto the template.
For example, you can insert an image, text, button, and more into your alert bar.

Now you will view an alert bar on your webpage at the bottom. You can adjust the placements with ‘floating bar settings’. Here you can specify the web area on which you want to display an alert bar and also alter the font style, font, size, and text color. Change the countdown timer as well. Once you are satisfied with the design of an alert bar, make sure to click the 'Save' button.
Method 2: Create an alert bar with Thrive leads
Another method to insert an alert bar is to use Thrive Leads. Thrive Leads is a free plugin that allows you to generate powerful automation with the Thrive Themes suite. The Thrive Themes suite comprises tools you need to engage your audience and subsequently include them in your email list.
The most advantageous feature of using Thrive Leads is that It generates leads via alert bars, lightboxes, slide-in popups, and more.
To use the Thrive Themes, you need to visit the website and sign up for an account. To get started, simply press the 'Start Now' button. Once you install the Thrive Product Manager plugin on your WordPress website, that will create a lead to display an alert bar on your website.
Method 3: Use custom HTML/CSS manually to create and customize an alert bar in WordPress
If you do not wish to take the help of OptinMonster and other plugins to create and customize an alert bar in WordPress, then we have brought a straightforward solution to this.

You can add these lines of code with the help of the WPCode plugin.
The user is using one of the best plugins for creating custom CSS. It lets you insert codes in an uncomplicated way with features like a built-in code snippets library, conditional logic, conversion pixels, and more. You will have to install and activate the WPCode plugin.
After this, head to Code Snippets ->+ Add Snippet from the WordPress dashboard. Pick out an option of the ‘Add Your Custom Code (New Snippet)’ option.
Next, provide a title for your snippet at the top and paste the CSS code to the Code Preview area.
Do not forget to change the Code Type to the ‘CSS Snippet’ option and press the ‘Save’ button to store all the customizations.
Now you can witness an alert bar added to your WordPress website’s homepage.
You can insert a header and footer to your WordPress website, in addition to this.
For this, navigate to the Code Snippets-> Headers & Footer in your WordPress admin dashboard. It's not a recommendable method for beginners as it may affect the other codes in the site and disturb the design format.
In some WordPress themes, the alert bar may overlap your navigational menus. So you need to adjust the height and width of an alert bar.
Method 4: Insert a Custom alert message to WordPress Pages
Are you wishing to insert custom alert messages into different parts of your website?
Yes?
Then you can go ahead with SeedProd, which is the finest website and landing page builder for WordPress.
You can display any kind of alert message on product pages, checkout pages, and shop pages with the help of SeedProd.
The plugin is a drag-and-drop builder that you can use to generate a custom theme and website pages without editing code. The Alert Block, which can be placed anywhere on your site, offers the capability to provide alerts.
The Alert block is essential to warn your customers that your stock is running low, highlight specific items on sale, or convey other time-sensitive warnings.
It’s very simple to insert the Alert block to your webpage along with the title and description. The plugin also lets you insert dynamic content such as dates and other query parameters. Additionally, you can make use of various customization options for the Alert block, such as changing its alignment, adjusting the font size, and editing the icon.
Conclusion
Attracting and engaging your audience is indeed the key to a website's success. SEO ranks will definitely increase. Traffic is most welcome on the site only when you have designed an eye-catching front end for your online business website. The alert bar is a value-added feature. It surely will grab visitors’ attention if you try any of the methods to use and customize an alert bar in WordPress that we have explained to you in this blog.

The WP theme bundle offers a comprehensive solution for creating a dynamic online presence, and within it lies a powerful tool like the WordPress Alert Bar. This feature allows website owners to effectively communicate important messages, promotions, or announcements to their visitors in a prominent yet non-intrusive manner. Customizing the WordPress Alert Bar is a user-friendly process that typically involves selecting colors, fonts, animations, and content to match the website's branding and style. With intuitive controls and options, users can tailor the appearance and behavior of the alert bar to seamlessly integrate with their website's design. This ensures that critical information reaches the audience promptly while maintaining a visually appealing and cohesive user experience. Whether it's highlighting limited-time offers or sharing essential updates, mastering the utilization and customization of the WordPress Alert Bar empowers website owners to engage their visitors effectively.


