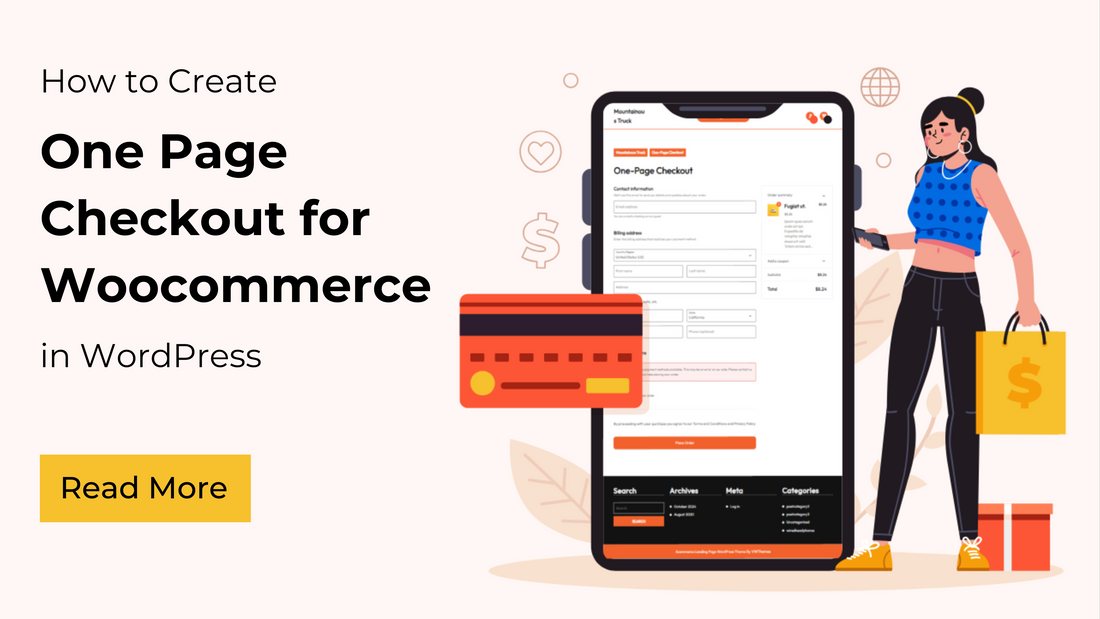
A One Page Checkout for Woocommerce page merges the product selection, cart, and checkout process into a single, seamless page. This streamlined approach allows customers to add products to their cart and complete the purchase without navigating through multiple pages, making the shopping experience faster and more convenient.
The goal of a one-page checkout is to reduce friction during the purchasing process, decrease cart abandonment, and boost conversion rates. By eliminating extra steps, you provide customers with a straightforward path to complete their orders, which is especially effective for stores with fewer products or flash sales and promotions.
In this guide, you'll learn how to create a one-page checkout using the Direct Checkout for WooCommerce plugin, or WooCommerce's built-in features, helping you optimize the checkout process and improve the overall shopping experience on your site.
What is One Page Checkout for Woocommerce?

A One Page Checkout for Woocommerce page is designed to allow customers to complete the entire purchasing process from product selection to payment on a single page. This contrasts with the typical WooCommerce checkout flow, where users go through multiple steps: adding items to a cart, proceeding to a cart page, and completing the purchase on a separate checkout page.
Key Features
- The page displays one or more products that the customer can choose directly from the checkout page. The product options might be shown in various layouts, such as a list, table, or grid.
- As the customer selects products, an order summary section updates in real-time to reflect the chosen items, quantities, and total cost.
- Right beneath or alongside the product selection, there is a checkout form where customers enter their billing and shipping information, select a payment method, and finalize the purchase without navigating to another page.
- The page is designed to dynamically update in real-time. For example, when a customer adds or removes a product, the total price and other order details update immediately.
- Customers can complete the payment process directly on the same page, with all the necessary payment methods (credit card, PayPal, etc.) available without leaving the page.
Benefits of Adding a One Page Checkout for Woocommerce Page
Adding a One Page Checkout for Woocommerce page to your online store provides several benefits that enhance the customer experience, improve your sales process, and ultimately drive higher conversion rates. Here are the key benefits:
- Reduced Cart Abandonment: By condensing the entire purchasing process into one page, you eliminate the need for customers to click through multiple pages, which can often lead to abandonment.
- Faster Checkout Process: The one-page format significantly speeds up the checkout process, making it easier for customers to make quick purchases, especially when shopping on mobile devices or in a hurry.
- Increased conversion rates: By simplifying the customer journey, you reduce the friction and steps involved in completing a purchase, which typically results in more successful checkouts and fewer abandoned carts. The easier it is to complete a purchase, the more likely customers are to make impulse buys, particularly during promotions, flash sales, or when promoting a single product.
- Improved User Experience: Customers appreciate a hassle-free shopping experience. By removing multiple steps, you create a seamless and intuitive user flow that is likely to enhance customer satisfaction.
- Mobile-Friendly Shopping: One-page checkout pages are generally more mobile-friendly, reducing the need for excessive scrolling and page loading. Mobile shoppers benefit from an optimized experience, which is crucial given the rising number of mobile-based purchases. You can also checkout some of the best mobile checkout page designs from our website.
Top One Page Checkout for Woocommerce Page Plugins
Here are some of the top One Page Checkout for Woocommerce Page Plugins:
Direct Checkout for Woocommerce

Direct Checkout for WooCommerce is a plugin designed to streamline the shopping experience by simplifying the checkout process, allowing customers to go directly to the checkout page or bypass unnecessary steps. It helps reduce cart abandonment and increases conversions by making the purchasing process faster and more user-friendly. The Direct Checkout for WooCommerce plugin is especially useful if your goal is to speed up the buying process and encourage more impulse purchases by reducing the number of steps needed to complete a transaction.
Key Features
- You can configure the plugin to redirect customers straight to the checkout page once they click the "Add to Cart" button, bypassing the cart altogether.
- It supports Ajax functionality, meaning customers can add products to the cart without reloading the page.
- It allows for a one-click checkout experience, where returning customers can quickly complete their purchase with previously saved details, making the checkout process faster and easier.
- The plugin also allows you to remove unnecessary fields from the checkout form, which can further simplify and speed up the checkout process.
WooCommerce Checkout by CheckoutWC

CheckoutWC Lite transforms your standard WooCommerce checkout into a sleek, conversion-optimized, and mobile-friendly experience. By combining the best elements of Shopify's intuitive design with WooCommerce’s powerful features, it helps boost your sales. This plugin simplifies the checkout process without the need for complex page or funnel builders. The ready-to-use templates can be deployed in just minutes, streamlining the purchase journey for your customers and maximizing profitability.
Key Features
- Customers can add products to their cart and complete the checkout process all on the same page, reducing the time and friction involved in placing an order.
- You can create custom checkout pages that combine product selection and checkout forms, tailored to specific product categories or special offers.
- By reducing the number of steps required to complete a purchase, it minimizes the chances of cart abandonment, leading to better conversion rates.
- The one-page checkout can be customized to display products in various formats, such as product tables, lists, or grids, making it more visually appealing and easy to navigate.
One Page Checkout and Layout for Woocommerce

The One Page Layout and Checkout for WooCommerce Plugin is designed to simplify the shopping and checkout experience by merging the entire purchase process into a single page. This plugin allows customers to view products, add them to the cart, and complete the checkout process without leaving the page, creating a seamless and efficient user experience. It's especially useful for stores looking to speed up the buying process and reduce cart abandonment.
Key Features
- Customers can browse products, select options like variations or quantities, and immediately fill in their checkout details without ever leaving the page.
- The plugin uses AJAX functionality to update the cart and checkout details in real-time.
- It often includes customization options that allow store owners to design the checkout page layout to match their site's branding and style.
- Products can be displayed in various formats, such as lists, grids, or tables, allowing customers to select products without the need to navigate between different pages.
- The one-page layout is mobile-friendly, offering a smooth, responsive design that adapts well to smaller screens.
How to Setup One Page Checkout for Woocommerce
Now is when we are heading with the step-by-step guide on how to set up One Page Checkout for Woocommerce.
1. Setup your Website

The first and foremost step for a One Page Checkout for Woocommerce is to have a website. If you already own a website, then it will be easy to set it up.
To set up a WordPress website, you need a hosting and domain service, as these are the building blocks of any website. A hosting service provides the base for your website through which your website runs on the web. It works like a home to your website, where you can store all your website files along with a space to run a site on the web. Whereas the domain is the addressing element of your website and through which users can locate you on the web. A hosting service gives reliability, security, and performance benefits to your website. Being such a huge place in the web world, there are so many hosting providers currently rolling on the web.
Among those, choosing the right one can be crucial at times. On the contrary, there are certified hosting services that provide a way to set up the domain as well. We suggest the Bluehost hosting service for this tutorial. It offers all the best website services, perfect stability for your site, and a free domain. So, you need to first visit the Bluehost official website and complete all the purchase procedures so that you can get access to the hosting service. Meanwhile, between the hosting purchase, it asks you to set up the domain for your website. Once you have completed the purchase, you can simply install WordPress, which is a single-click step. Yes, Bluehost makes it much easier for its users to install WordPress with its single-click feature. And with a single click, you can get access to your WordPress website with a default theme installed.
You have a blank WordPress website ready to make changes further.
2. Choose a WordPress Theme That Best Fits Your Business

You have a blank website ready to make changes and customize it to your standards. But what’s necessary is to choose the right theme for your website.
A theme plays a crucial role in your website when it comes to the right appearance and performance. A theme is a collection of templates and features that help in lifting up the overall functionality of your site. VW Themes has a superb collection of notch-quality themes that are skilled on every basis. They are skilled in functionality, appearance, and security too.
Their landing page WordPress theme is our top pick for this blog. VW’s Landing Page WordPress Theme is one of the best-selling themes you might ever get. The theme showcases a perfect place to start your one-page checkout website or any business or blog website. The theme comes with a colorful range of templates that are fully customizable with advanced features to unlock. It lets you design landing and best checkout page design with its solid-quality templates. Its unique slider layouts are commendable and allow your content to fit so well as a professional.
Install and Configure WooCommerce

The next step is to get WooCommerce, as this is the only base where you can set up the One Page Checkout for Woocommerce for your site. To install Woocommerce, which is a plugin, reach your WordPress website’s dashboard and tap the Plugins section. Under multiple options, tap Add New, and you will reach a page with WordPress plugins to look for. Here, you need to search Woocommerce and hit the install and activate button. After activation, WooCommerce will automatically launch the Setup Wizard to guide you through the basic configuration steps.

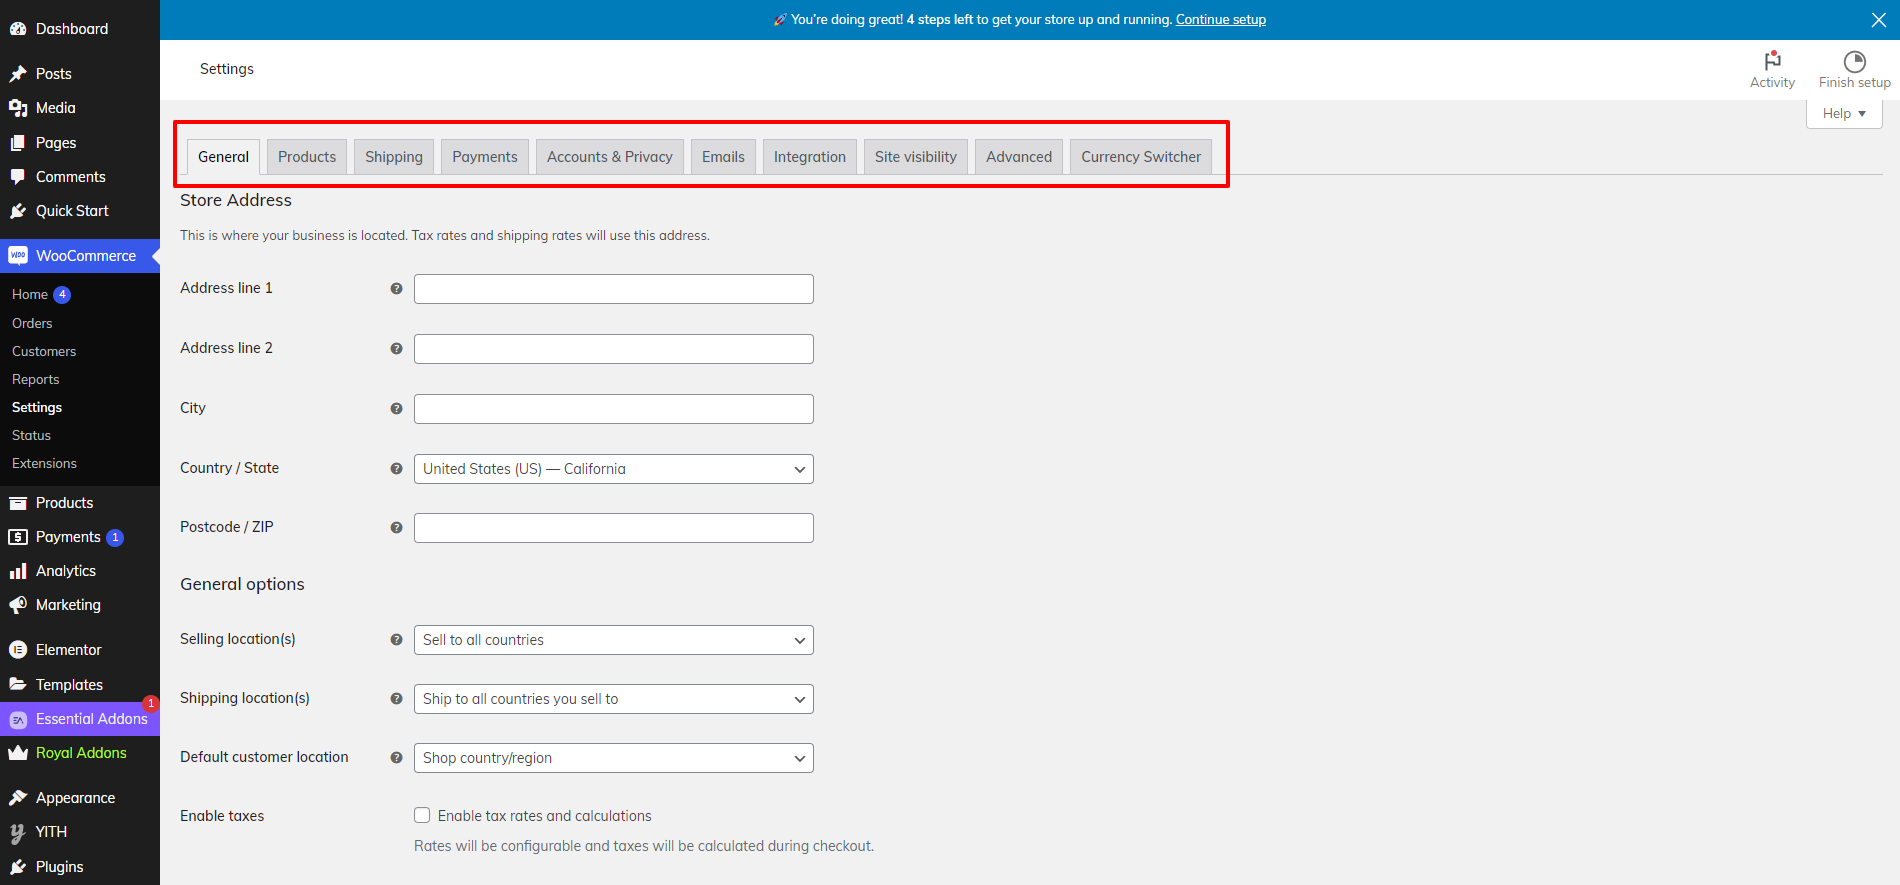
- Store Setup: Enter the physical address of your store, which will be used for tax and shipping calculations. Choose your store’s currency, country, and region. Select the types of products you will be selling (physical, digital, or both).
- Payment options: Enable payment gateways like PayPal, Stripe, or Direct Bank Transfer. If you want more options, you can add more payment gateway plugins later. You can also choose Cash on Delivery if you offer it. Configure your account details for PayPal or Stripe if selected.
- Shipping options: Define shipping zones based on regions or countries where you ship products. Set a fixed price for shipping within certain zones. Offer free shipping for specific zones or orders over a certain amount. WooCommerce allows you to integrate services for printing shipping labels if needed.
- Tax Setup: If your store is required to charge tax, enable tax options. WooCommerce will automatically configure basic tax settings for you. If applicable, WooCommerce can automatically calculate tax based on the customer's location.
You can adjust these settings later in the WooCommerce > Settings > Tax section. Moreover If you are want a proper guide for installing Woocommerce on your website than you can visit our blog on "Installation of Woocommerce plugin"
Install and configure the “Direct Checkout for Woocommerce” plugin.

Creating a One Page Checkout for Woocommerce using the Direct Checkout for WooCommerce plugin is a great way to streamline the shopping process by simplifying the checkout flow. After Installing and activating the Plugin here’s a step-by-step guide to setting it up:
- After activating the plugin, go to WooCommerce > Direct Checkout in the WordPress dashboard.

- Check the option to enable Direct Checkout. This will allow customers to skip the cart page and go directly to the checkout page.
- Go to General Settings and set the Add to Cart Behavior.
- Enable the setting to automatically redirect users to the checkout page after adding a product to the cart.

- You can also enable AJAX to add products to the cart to ensure products are added without reloading the page.
- In the Checkout Settings tab, you can remove unnecessary checkout fields like company name, phone number, or additional fields to speed up the process.

- Visit the Pages section and then hit the Add New option under the dashboard.
- Name your page, for example, "One Page Checkout."
- In the page editor, you can use the WooCommerce Shortcod es or a page builder (like Elementor) to display the products and the checkout form on the same page.
- Here are some shortcodes you can use to create a one-page checkout:
- Display Products: To display a product or a group of products on the checkout page, use the shortcode - [products limit="3" columns="3" category="your-category-slug"]

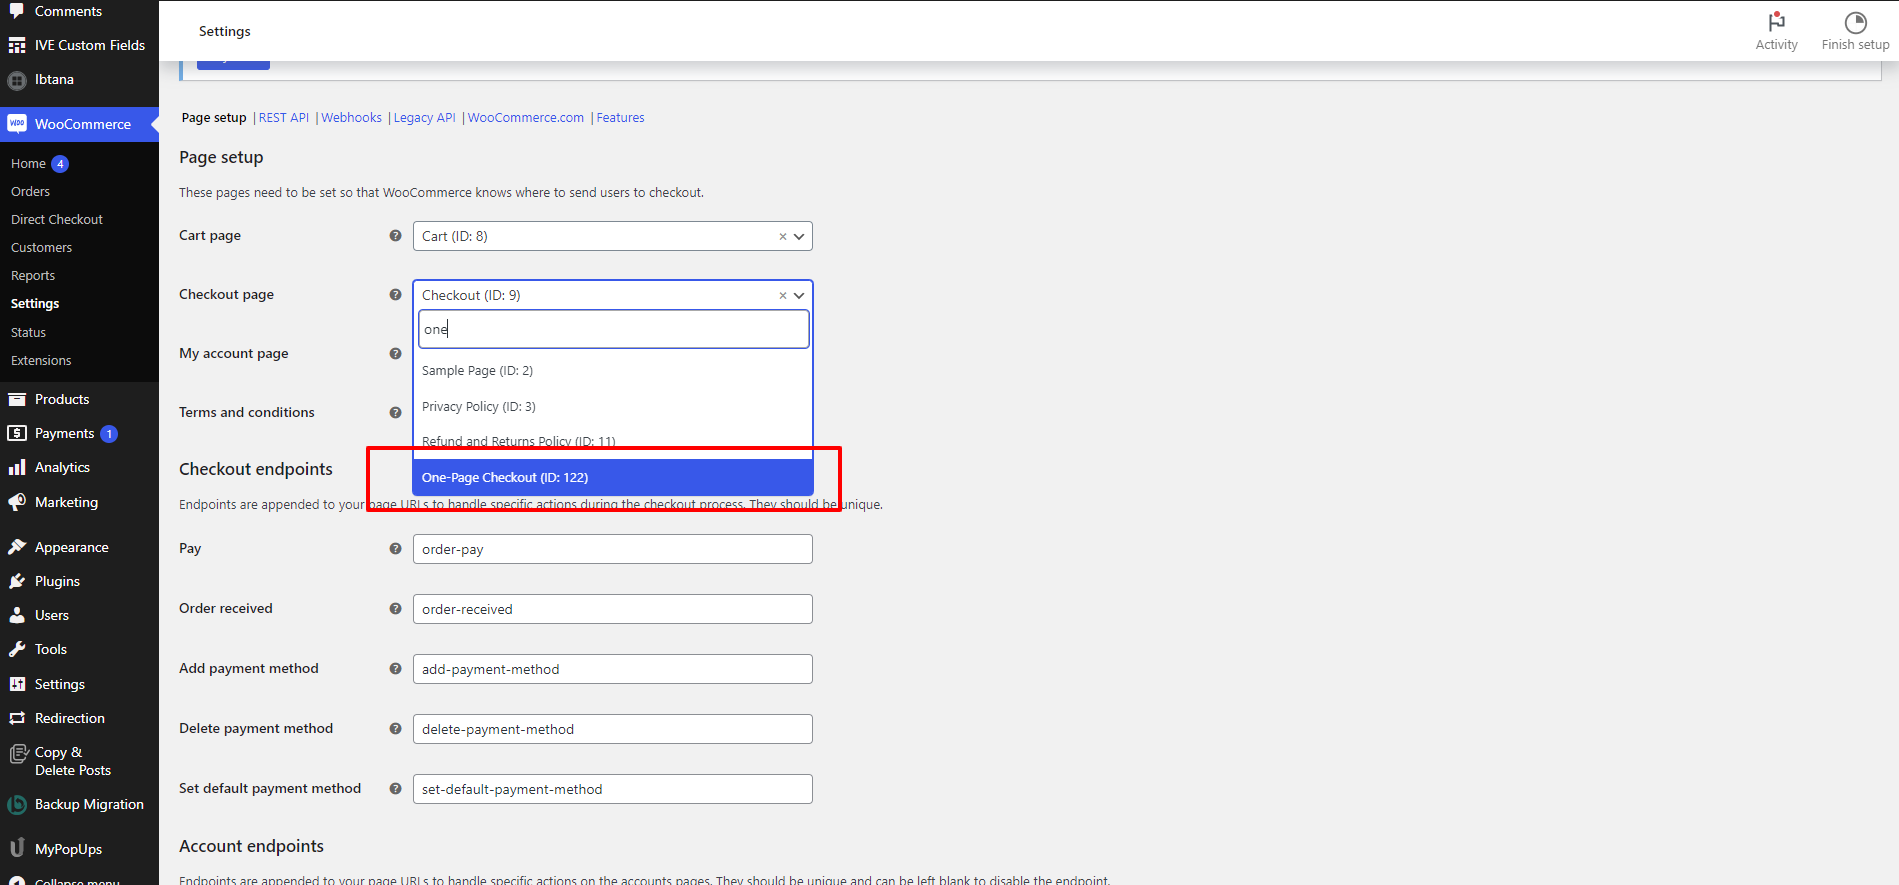
- Go to WooCommerce > Settings > Advanced.
- Under Page Setup, find the Checkout Page dropdown and select the page you just created (e.g., “One Page Checkout”).
- Navigate to the new One Page Checkout page and try adding products to the cart. The products should appear, and the checkout form should be available directly on the same page.
- Test the purchasing process to ensure everything works smoothly.
Test and preview your website

You have made it to create a One Page Checkout for Woocommerce, and now it's time to take a preview before getting it published. Testing your website becomes a necessary task as it helps in picking out the errors along with making necessary changes before publishing. To test your website, you must look at whether the website is actually running well on every screen size. All the plugins and themes should be updated with the latest version. Look for the checkout page and landing pages and their smooth working. And that’s all. You are now ready to bring your website on the web for the users.
Conclusion
Creating a One Page Checkout for Woocommerce page significantly enhances the shopping experience by simplifying the process, reducing cart abandonment, and improving conversion rates. Using the Direct Checkout for WooCommerce plugin, or WooCommerce's built-in functionalities, you can create a streamlined, efficient purchasing flow where customers can view products, add them to their cart, and complete the checkout process all from a single page.
By integrating everything into a single page, you provide a faster, simpler, and more user-friendly checkout experience, ultimately boosting customer satisfaction and sales. Here in this blog, you can see how perfectly the step-by-step guide shows how to create a One Page Checkout for Woocommerce. You can use this guide if you are looking for a perfect One Page Checkout for Woocommerce creation on your site.
Don't forget that if you are new to all these things and setting your website than you can use Premium themes or the WP Theme bundle from VW Themes, all of these premium themes are woocommerce integrated and comes with one-click demo importer to help you setup your website in just one-click. These themes are now available at a discounted rate, checkout our WordPress Halloween Deals to find out exciting offers this Halloween season.


