Customizing the WooCommerce checkout page is a vital step in enhancing the user experience and boosting conversion rates on your online store. The checkout process is often the final hurdle between potential customers and completed purchases, making it essential to create a seamless and engaging experience. By tailoring the checkout page to reflect your brand's identity and streamline the purchasing process, you can reduce cart abandonment rates and increase customer satisfaction.
In this blog post, we’ll explore various strategies and tools to Customize WooCommerce Checkout Page effectively. From modifying the layout and design to adding custom fields and optimizing for mobile devices, these adjustments can significantly impact how customers interact with your store. We’ll also discuss best practices for ensuring your checkout process is user-friendly and secure, as well as tips for integrating payment gateways that suit your business needs.
So, let’s dive in and transform your checkout page!
How to Customize WooCommerce Checkout Page
Customizing the WooCommerce checkout page can significantly enhance the user experience and increase conversion rates. The checkout page is a critical component of any online store, as it’s where customers finalize their purchases. Customization allows you to streamline the process, add necessary fields, and improve the overall aesthetics of the page. Here’s a detailed steps to Customize WooCommerce Checkout Page effectively.
Step 1: Backup Your Site

Before you dive into the process to Customize WooCommerce Checkout Page, the very first and crucial step is to back up your site. This precautionary measure ensures that you can restore your website to its original state if anything goes awry during the customization process. A backup serves as your safety net, safeguarding your hard work and preventing potential data loss. If you want a detailed guide you can also follow our blog, on How to backup WordPress website.
To effectively back up your WordPress site, consider using a reliable backup plugin like UpdraftPlus or BackupBuddy. These plugins streamline the backup process by allowing you to create a full backup that includes both your database and all files associated with your site. UpdraftPlus, for example, offers automated backups and cloud storage options, ensuring your data is not only secure but also easily retrievable.
Once your backup is complete, you can proceed with confidence, knowing that your original setup is safe. This step is vital, especially when customizing critical components like the checkout page, where any changes can impact the overall user experience and conversion rates. With your site backed up, you are now ready to move forward with the customization process.
Step 2: Accessing WooCommerce Settings

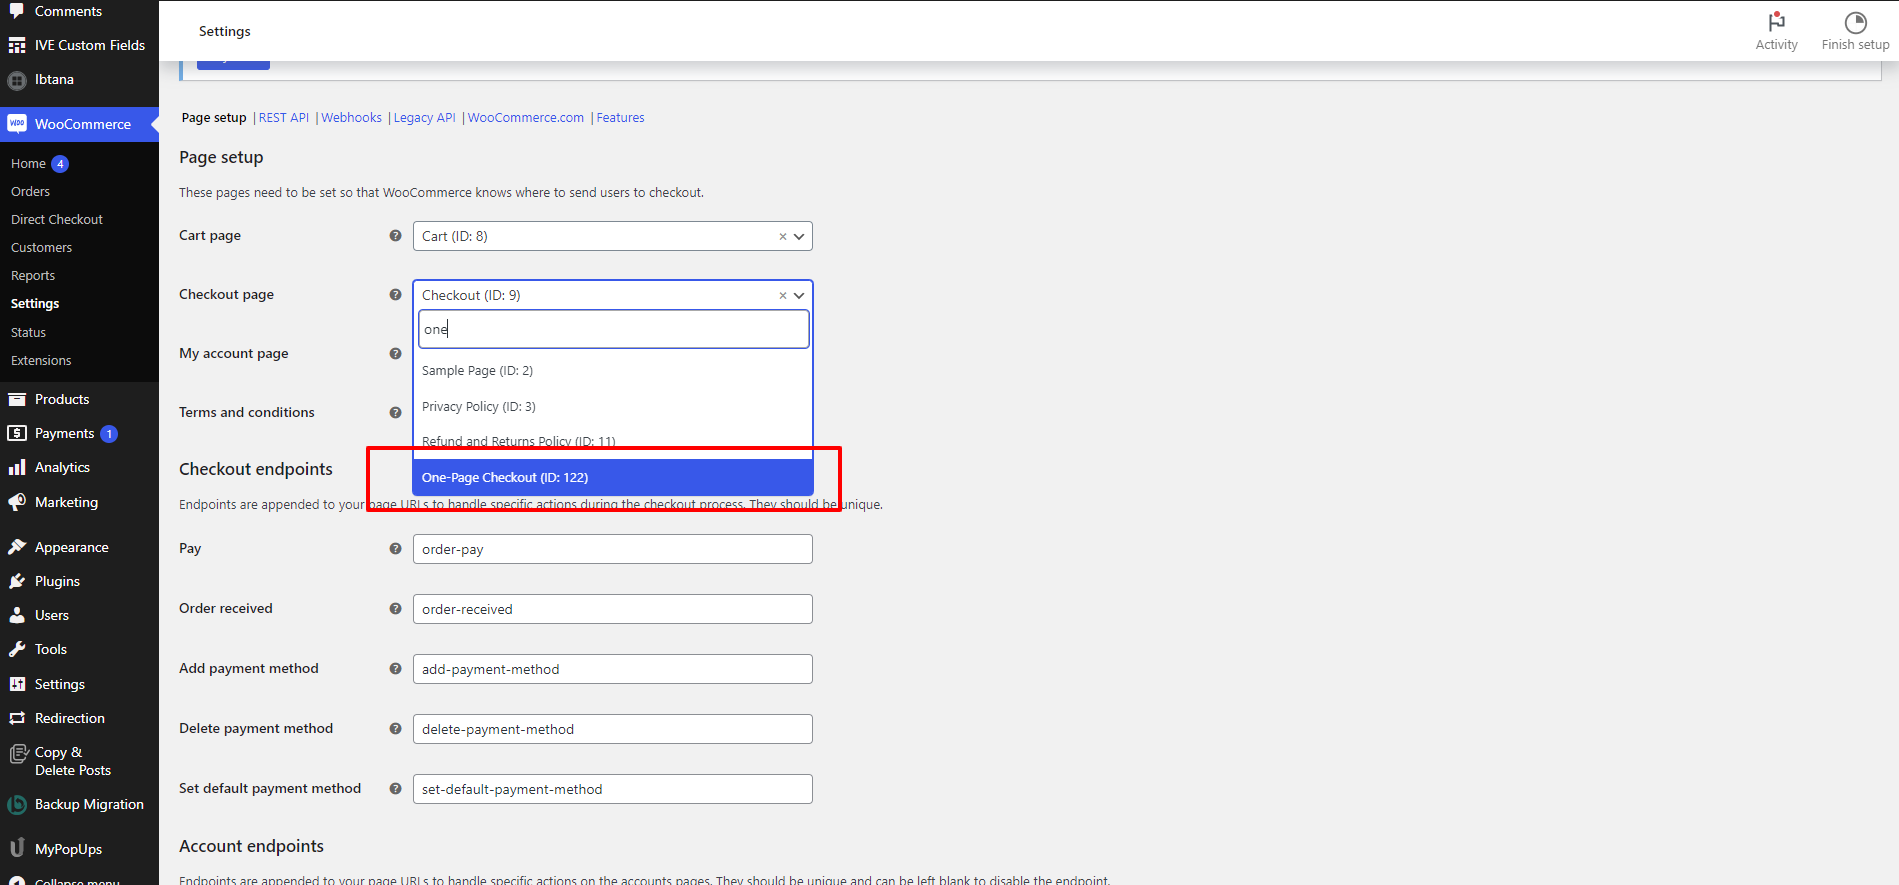
To begin customizing the WooCommerce checkout page, the first step is to navigate to your WordPress dashboard. From there, you will find a sidebar menu that provides various options for managing your site. Locate and click on the “WooCommerce” option, which is typically situated toward the middle of the menu. This will expand a submenu; select “Settings” from this list. The settings page is crucial as it houses a variety of options related to your WooCommerce store’s configuration.
Upon accessing the settings, you will notice several tabs across the top, including “General,” “Products,” “Shipping,” “Payments,” “Accounts & Privacy,” and others. Each tab contains specific settings that govern different aspects of your online store. To effectively Customize WooCommerce Checkout Page, it’s essential to focus particularly on the “Accounts & Privacy” and “Payments” tabs.
In the “Accounts & Privacy” section, you can manage settings related to user accounts, such as enabling guest checkout, which allows customers to make purchases without registering for an account. This can streamline the checkout process and reduce cart abandonment rates. Meanwhile, the “Payments” tab allows you to configure various payment methods available to your customers, ensuring that your checkout page meets their preferences for ease and security. Adjusting these settings is foundational in creating a user-friendly and efficient checkout experience for your customers.
Step 3: Enable Guest Checkout

Enabling guest checkout is a crucial step to Customize WooCommerce Checkout Page, as it directly addresses the preferences of many online shoppers. For many customers, the option to checkout without creating an account enhances their shopping experience and can significantly reduce cart abandonment rates. When potential buyers face lengthy registration processes, they may abandon their carts in frustration, leading to lost sales opportunities. To combat this, navigate to the “Accounts & Privacy” tab within your WooCommerce settings. Here, you will find a straightforward option that allows you to enable guest checkout.
Simply check the box next to “Allow customers to place orders without an account.” This setting is a game changer, as it allows users to complete their purchases quickly and efficiently without the hurdle of creating a user account. By streamlining this process, you cater to the needs of customers who prefer convenience and speed during their shopping experience. Additionally, this option can help build trust with your customers, as it demonstrates your commitment to providing a user-friendly experience. Ultimately, enabling guest checkout is a vital customization that not only enhances user satisfaction but also helps boost your overall conversion rates.
Step 4: Customize Checkout Fields with a Plugin

To effectively Customize WooCommerce Checkout Page, modifying the checkout fields is a critical step that enhances user experience and captures relevant information for your business. WooCommerce comes with a default set of fields for billing and shipping details. However, depending on your specific needs, you may wish to add, remove, or adjust these fields to gather more pertinent data. For comprehensive customization, you can utilize plugins such as WooCommerce Checkout Field Editor or Checkout Manager for WooCommerce.
- Install the Plugin: Begin by navigating to the “Plugins” section in your WordPress dashboard. Click on “Add New,” then search for your chosen plugin. Once located, install and activate it to integrate it into your WooCommerce setup.
- Edit Fields: After activation, look for new options in the WooCommerce settings. You should find a new tab titled “Checkout Fields.” Here, you can easily drag and drop fields to reorder them, click on existing fields to make edits, or add new fields as needed. Common custom fields that businesses often include are the company name, tax ID, and order notes.
- Field Settings: Each field allows for specific configurations, including settings to designate whether it’s required, the type of field (such as text, checkbox, or radio button), and any placeholder text. It’s essential to balance the information you collect with user experience overloading the checkout with mandatory fields can lead to abandoned carts.
Step 5: Change Field Labels and Placeholders

Another effective way to customize WooCommerce checkout page is by changing field labels and placeholders. Personalizing these elements can significantly improve clarity and engagement during the checkout process. By using the field editing feature in your chosen plugin, you can easily modify the labels of checkout fields to make them more descriptive. For instance, instead of a generic label like “Address,” you could specify “Shipping Address” or “Billing Address,” helping users understand exactly what information is required and reducing the likelihood of errors.
Additionally, customizing placeholders within the fields can serve as helpful guidance for users. Placeholders provide contextual hints about the information needed, enhancing usability. For example, in the “Phone Number” field, incorporating a placeholder like “e.g., 123-456-7890” can assist users in formatting their input correctly, minimizing confusion and improving data accuracy. This thoughtful approach not only streamlines the checkout process but also fosters a more intuitive experience for customers. By taking the time to customize field labels and placeholders, you create a checkout page that feels tailored to your brand and meets the needs of your users, ultimately contributing to higher satisfaction and conversion rates.
Step 6: Customize the Checkout Page Design

Customizing the WooCommerce checkout page is essential for enhancing the visual presentation and improving conversion rates. The design of the checkout page significantly impacts how customers perceive your brand and their willingness to complete a purchase. To begin customizing the best checkout page design, you have two primary methods: using your theme’s built-in customization options or employing a dedicated page builder like Elementor or WPBakery.

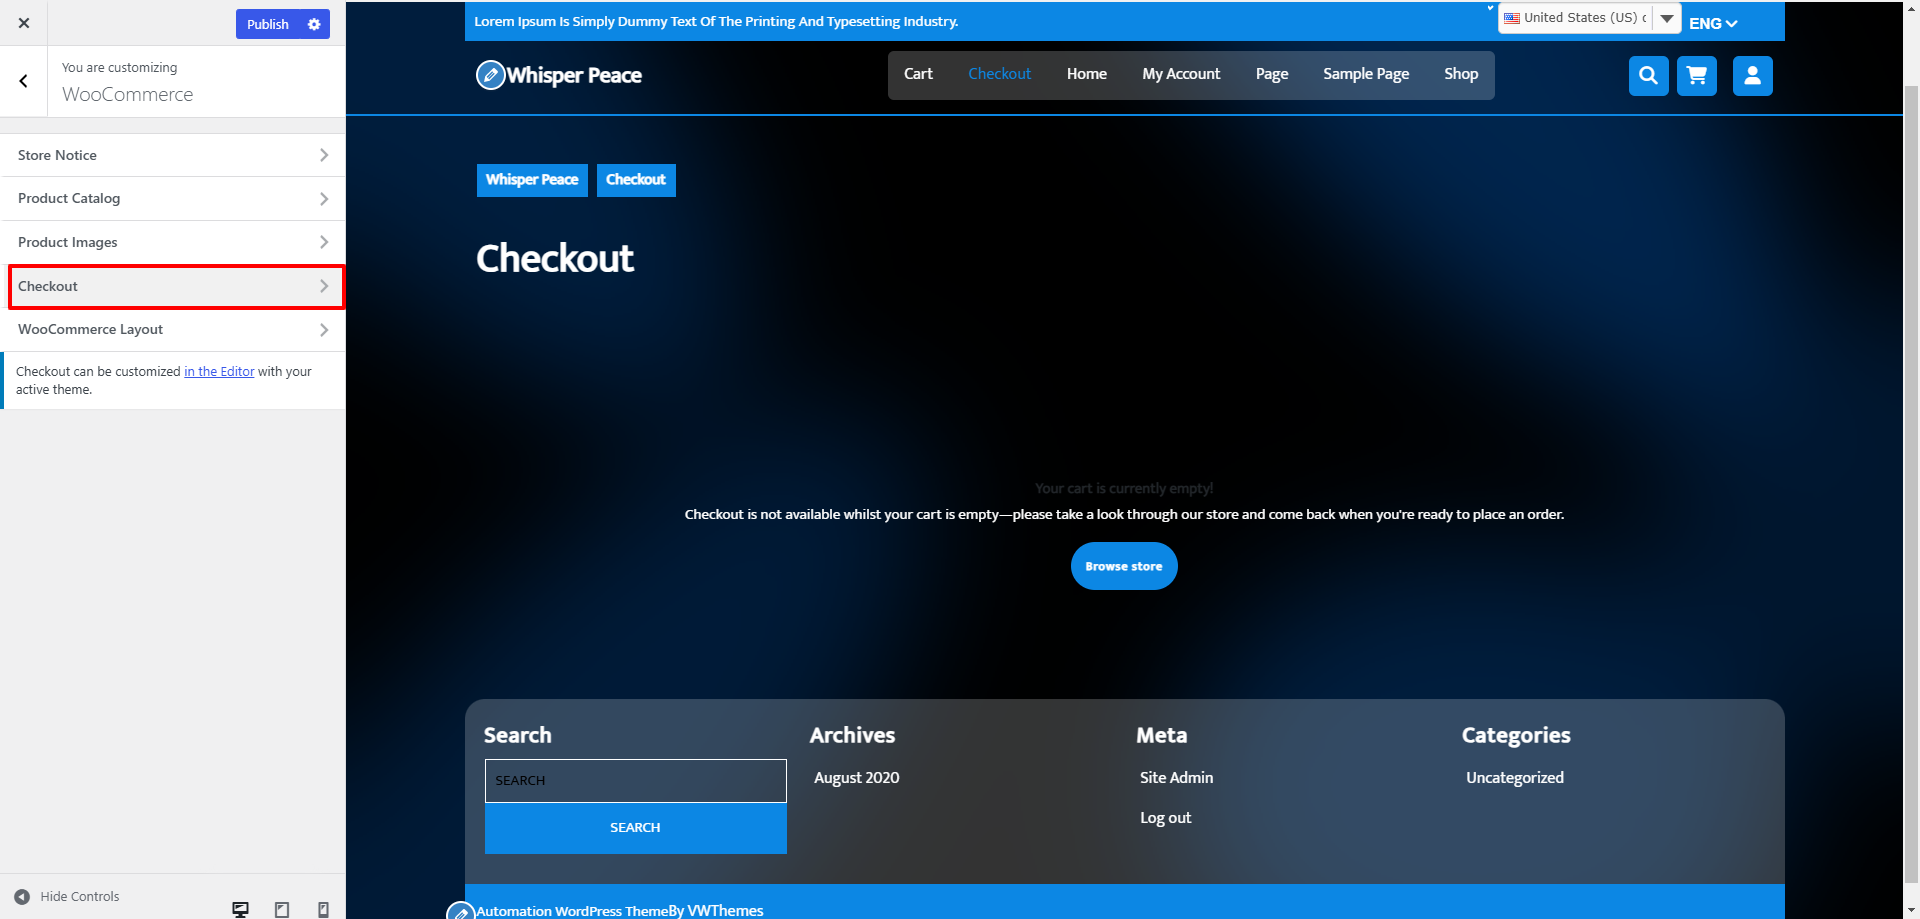
- Using Theme Customizer: Start by navigating to “Appearance” in your WordPress dashboard and selecting “Customize.” In this section, you’ll discover various options to modify colors, fonts, and layout specifically for WooCommerce pages, including the checkout. It’s important to ensure that the design elements align with your overall brand aesthetic, as consistency fosters trust and familiarity with your customers. For example, adjusting button colors to match your brand’s color scheme can create a more cohesive look. If you are designing your website and are stuck at any point our Blog guide will help you customize your theme with breeze, refer our blog "How to customize WordPress Theme"
- Using a Page Builder: If you’re utilizing a page builder, you have the flexibility to create a more customized and dynamic checkout layout. This approach allows you to design a user-friendly, mobile-responsive, and visually appealing checkout page. You can enhance the layout by incorporating elements such as testimonials, security assurances, or a summary of order details, which can reassure customers about their purchase decisions and minimize cart abandonment. Ultimately, customizing the WooCommerce checkout page design is a vital step in optimizing the shopping experience for your customers.

Here’s a Pro Tip: If you’re looking for a reliable, user-friendly solution to build your website effortlessly, Ibtana WordPress Website Builder is the perfect choice. Designed to cater to both beginners and professionals, this page builder offers a seamless experience with its intuitive drag-and-drop interface and extensive customization options. Whether you’re creating a blog, portfolio, eCommerce store, or business website, Ibtana provides pre-designed templates and flexible design tools to suit your needs. Its lightweight and responsive framework ensures your site performs optimally across all devices. Plus, with features like block editing, SEO-friendly layouts, and real-time previews, you have everything you need to design a visually stunning and functional website. Ibtana makes website creation a breeze, empowering you to bring your ideas to life without needing technical expertise.
Step 7: Add a Custom Logo and Brand Colors

To customize WooCommerce checkout page, incorporating your logo and brand colors is essential for establishing trust and familiarity with your customers. A well-branded checkout page reassures shoppers that they are still within your online store, enhancing their overall experience. To add your logo, navigate to the “WooCommerce” settings in your WordPress dashboard, specifically under the “General” tab. Here, you can upload your logo image, ensuring it’s appropriately sized for the checkout header. A logo that fits well and does not overwhelm the page contributes to a clean, professional appearance.
When it comes to brand colors, your theme’s customizer will typically allow you to set primary and accent colors. Access the “Customize” menu and look for the “Colors” section, where you can select hues that reflect your brand identity. By using consistent colors that match the rest of your website, you create a cohesive look that reassures customers as they navigate through the checkout process. This visual consistency not only enhances the aesthetic appeal of your checkout page but also fosters a sense of security and professionalism. Ultimately, a well-branded checkout page can significantly impact conversion rates, encouraging customers to complete their purchases with confidence as they recognize and trust your brand.
Step 8: Implementing Order Summary Features
Implementing order summary features is a crucial step when you aim to customize WooCommerce Checkout Page. An order summary reassures customers about their purchases by providing a clear overview of what they are about to buy before finalizing their transaction. This element is vital for enhancing user confidence and reducing anxiety, which can be significant factors in cart abandonment. To effectively implement an order summary, consider using plugins like “WooCommerce Cart Add-Ons,” which enable you to display a comprehensive order summary directly on the checkout page. This summary can include essential details such as product names, quantities, prices, any applied discounts, and taxes.
For optimal visibility, ensure that the order summary is prominently displayed. You might consider placing it in a sidebar or at the top of the checkout page, where it’s easily accessible to customers. A well-structured layout allows users to review their orders at a glance, making the checkout experience seamless. This transparency in the ordering process not only helps customers feel informed about their purchases but also reinforces trust in your store. Ultimately, a clear and visible order summary is a powerful feature that can significantly enhance your checkout process, leading to increased customer satisfaction and improved conversion rates as you customize WooCommerce checkout page.
Step 9: Configure Payment Gateways

Configuring payment gateways is a crucial step to customize WooCommerce checkout page, as it directly impacts your customers' purchasing experience. Having multiple payment options is vital for catering to diverse customer preferences, ultimately leading to increased conversion rates. To begin this process, navigate to the “Payments” tab in your WooCommerce settings from the WordPress dashboard. Here, you’ll find a comprehensive list of available payment methods, such as credit cards, PayPal, and bank transfers. You can easily enable or disable these options to tailor your payment methods to your target audience.
To further enhance convenience and speed during checkout, consider integrating additional payment options like Apple Pay or Google Pay. These payment solutions not only provide a seamless experience for mobile users but also cater to customers who prefer quick and secure transactions. Many of these options may require additional plugins or extensions to function properly. Fortunately, you can find a wide variety of these plugins in the WooCommerce marketplace, allowing you to expand your payment capabilities effortlessly.
By diversifying the payment methods available on your checkout page, you’ll create a more inclusive shopping environment that accommodates various customer needs and preferences. This strategic customization of your WooCommerce checkout page can significantly enhance user satisfaction, reduce cart abandonment rates, and ultimately drive higher sales for your online store.
There are various payment gateways out there from which we have handpicked some of the best payment gateways for WordPress from which you can choose the best one that suits your website.
Step 10: Test Checkout Functionality

After customizing your WooCommerce checkout page, the next critical step is to test the checkout functionality thoroughly. This ensures that all modifications work seamlessly and provide a smooth user experience. Start by creating a test account to simulate a full purchase, allowing you to walk through the entire checkout process as a customer would.
Focus on field validation first; ensure that required fields cannot be bypassed. For instance, if you’ve added mandatory fields like phone number or address details, test the checkout flow by attempting to proceed without filling them in. The system should prompt users to complete these fields before moving forward.
Next, confirm that payment processing functions correctly across all enabled gateways. Conduct transactions using different payment methods, such as credit cards and PayPal, to verify that payments are processed accurately and that the customer receives the appropriate feedback.
Finally, check the order confirmation process. Once the payment is successful, ensure that customers receive a confirmation email summarizing their order. Additionally, verify that the order appears accurately in your WooCommerce dashboard, reflecting all necessary details, including items purchased, payment method, and customer information.
By meticulously testing these elements after you customize WooCommerce Checkout Page, you can identify and resolve any issues, ensuring a smooth and efficient checkout experience for your customers.
Step 11: Optimize for Mobile

As you Customize WooCommerce Checkout Page, optimizing it for mobile devices is critical due to the growing trend of mobile shopping. Start by testing the checkout experience on various devices and screen sizes to identify potential usability issues. This step ensures that users have a seamless experience, regardless of how they access your site. Adjust font sizes to make them readable on smaller screens, and ensure that button placements are intuitive, allowing users to navigate easily.
Form field sizes should also be adapted for mobile use; larger fields make it easier for users to enter information without frustration. Implement responsive design principles to ensure that all elements on the checkout page adapt smoothly to different screen sizes. This includes ensuring that images and buttons resize correctly without distorting the layout.
Particularly focus on buttons, as they are crucial for user interaction. Ensure they are large enough for easy tapping, reducing the chances of misclicks, which can lead to user frustration. Additionally, consider the spacing between buttons and form fields to prevent accidental clicks. By prioritizing these adjustments, you can create a user-friendly mobile checkout experience that encourages customers to complete their purchases and enhances your overall conversion rates as you Customize WooCommerce Checkout Page.
Step 12: Add Trust Signals
To Customize WooCommerce Checkout Page effectively, incorporating trust signals is crucial for building confidence with your customers. Trust signals include elements such as security badges, money-back guarantees, and clear privacy policies. These components reassure customers that their personal and payment information is secure, which is vital in the online shopping environment. A robust display of trust signals can significantly reduce cart abandonment rates by making customers feel more comfortable completing their purchases.
Positioning trust badges strategically is essential. Ideally, place them near the payment section, as this is where customers may have the most apprehension. Badges from recognized security services (like SSL certificates, McAfee Secure, or Norton Secured) help convey safety. Additionally, including a visible money-back guarantee statement can reassure customers that they can receive a refund if they are not satisfied with their purchase, further enhancing their trust.
Another effective placement is in the footer of the checkout page, where customers often look for additional information. Ensure that these badges and guarantees are easily recognizable and relevant to your target audience. By customizing the WooCommerce checkout page with these trust signals, you foster a secure shopping experience, encouraging customers to finalize their orders with confidence.
Step 13: Leverage Upselling and Cross-Selling Techniques

Leveraging upselling and Woocommerce cross-selling techniques is another powerful way to Customize WooCommerce Checkout Page and increase your average order value. By suggesting additional products during the checkout process, you can encourage customers to make supplementary purchases that enhance their initial selection. Using plugins like “WooCommerce Boost Sales,” you can effortlessly implement these strategies. This plugin allows you to recommend related products or offer discounts on complementary items, making it easy for customers to add them to their carts.
To maximize effectiveness, consider crafting customized messages that resonate with your audience. For example, phrases like “Complete your outfit with these accessories!” or “Customers also bought…” can gently prompt buyers to consider additional items that complement their current selection. However, it’s crucial to balance these suggestions with a clean and streamlined checkout experience. Avoid overwhelming customers with too many options; instead, position recommendations subtly so they feel like a natural extension of their shopping journey. By thoughtfully integrating upselling and cross-selling into your WooCommerce checkout page, you can enhance customer satisfaction and boost revenue without detracting from the overall buying experience. This approach not only helps increase sales but also fosters a more engaging and personalized shopping atmosphere.
Conclusion
In conclusion, customize WooCommerce checkout page is essential for enhancing user experience and boosting conversion rates. We’ve explored key steps, including backing up your site, accessing WooCommerce settings, and enabling guest checkout to streamline the purchasing process. By customizing checkout fields, changing field labels, and implementing an appealing design with your logo and brand colors, you can create a checkout experience that reflects your brand identity.
Moreover, incorporating order summaries, configuring various payment gateways, and optimizing for mobile ensures that customers can easily navigate and complete their purchases. Adding trust signals fosters confidence, while upselling and cross-selling techniques can increase your average order value. Remember to test your checkout functionality and continuously seek customer feedback to refine the experience. By following these steps, you’ll not only improve your checkout process but also build a loyal customer base, paving the way for increased sales and long-term success for your online store.


